Not seeing a Scroll to Top Button? Go to our FAQ page for more info.

baking

Autumn Fun

If you are looking for a little light relief from all that is happening in the world how about a spot of Halloween fun? These activities are a sure way to keep your little ones (or just you!) entertained during half term. Who says Autumn decor needs to be bright orange pumpkins and fake cobwebs, try our pumpkin painting activity to create your very own elegant autumn decorations.

Painted pumpkins

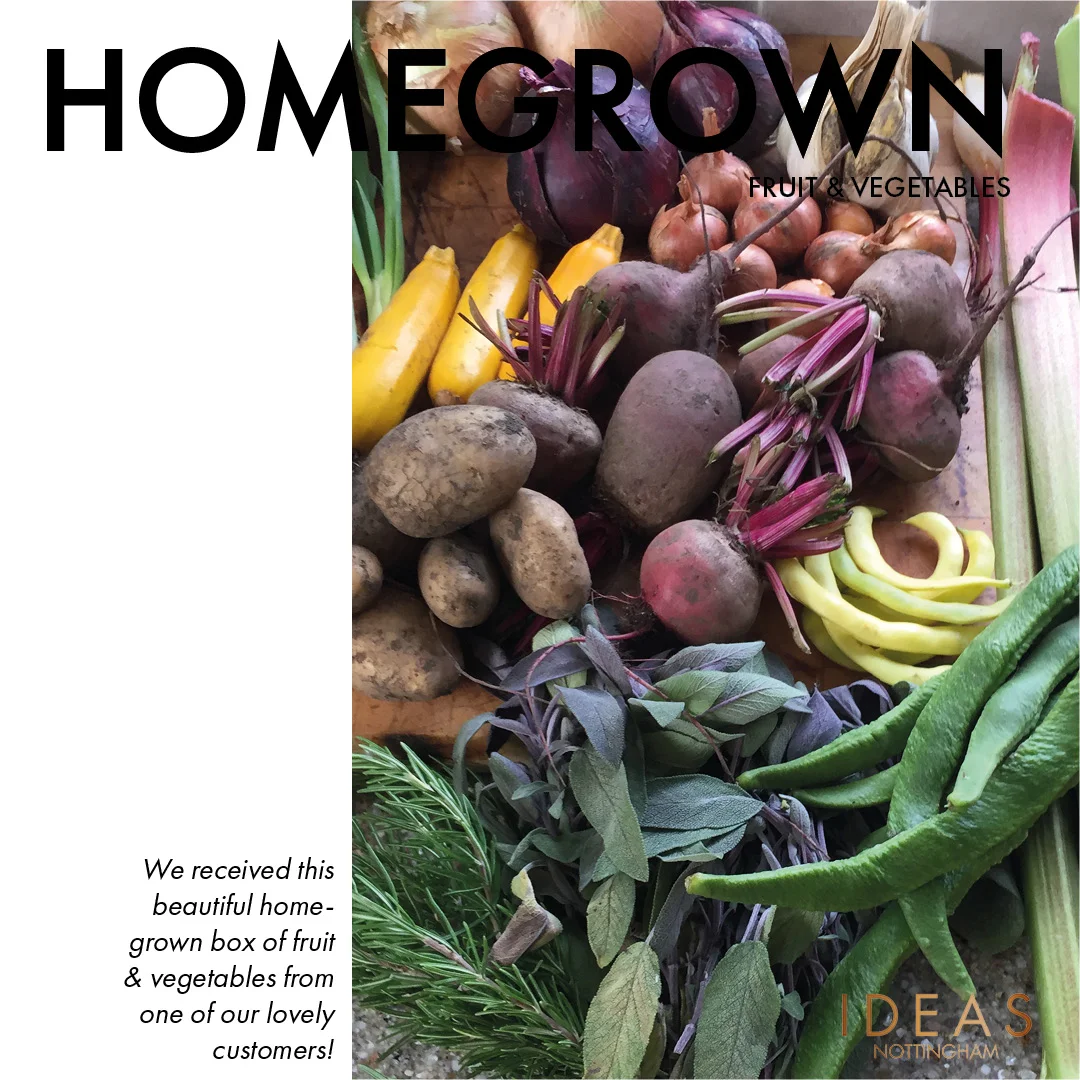
Head down to your local pumpkin picking spot (another great way to entertain the kids) and pick out a host of different sized pumpkins. If you have lots of tester pots of paint leftover from any room renovations this is a great way to use them up. Paint the pumpkins in an array of colours or stick to a particular palette that matches your interior. We love all white pumpkins with painted spots or drips on. Arrange at your front door with faux candles or use as a beautiful Halloween tablescape ready for a spooky family feast.

halloween pumpkins.jpg

Halloween Bakes

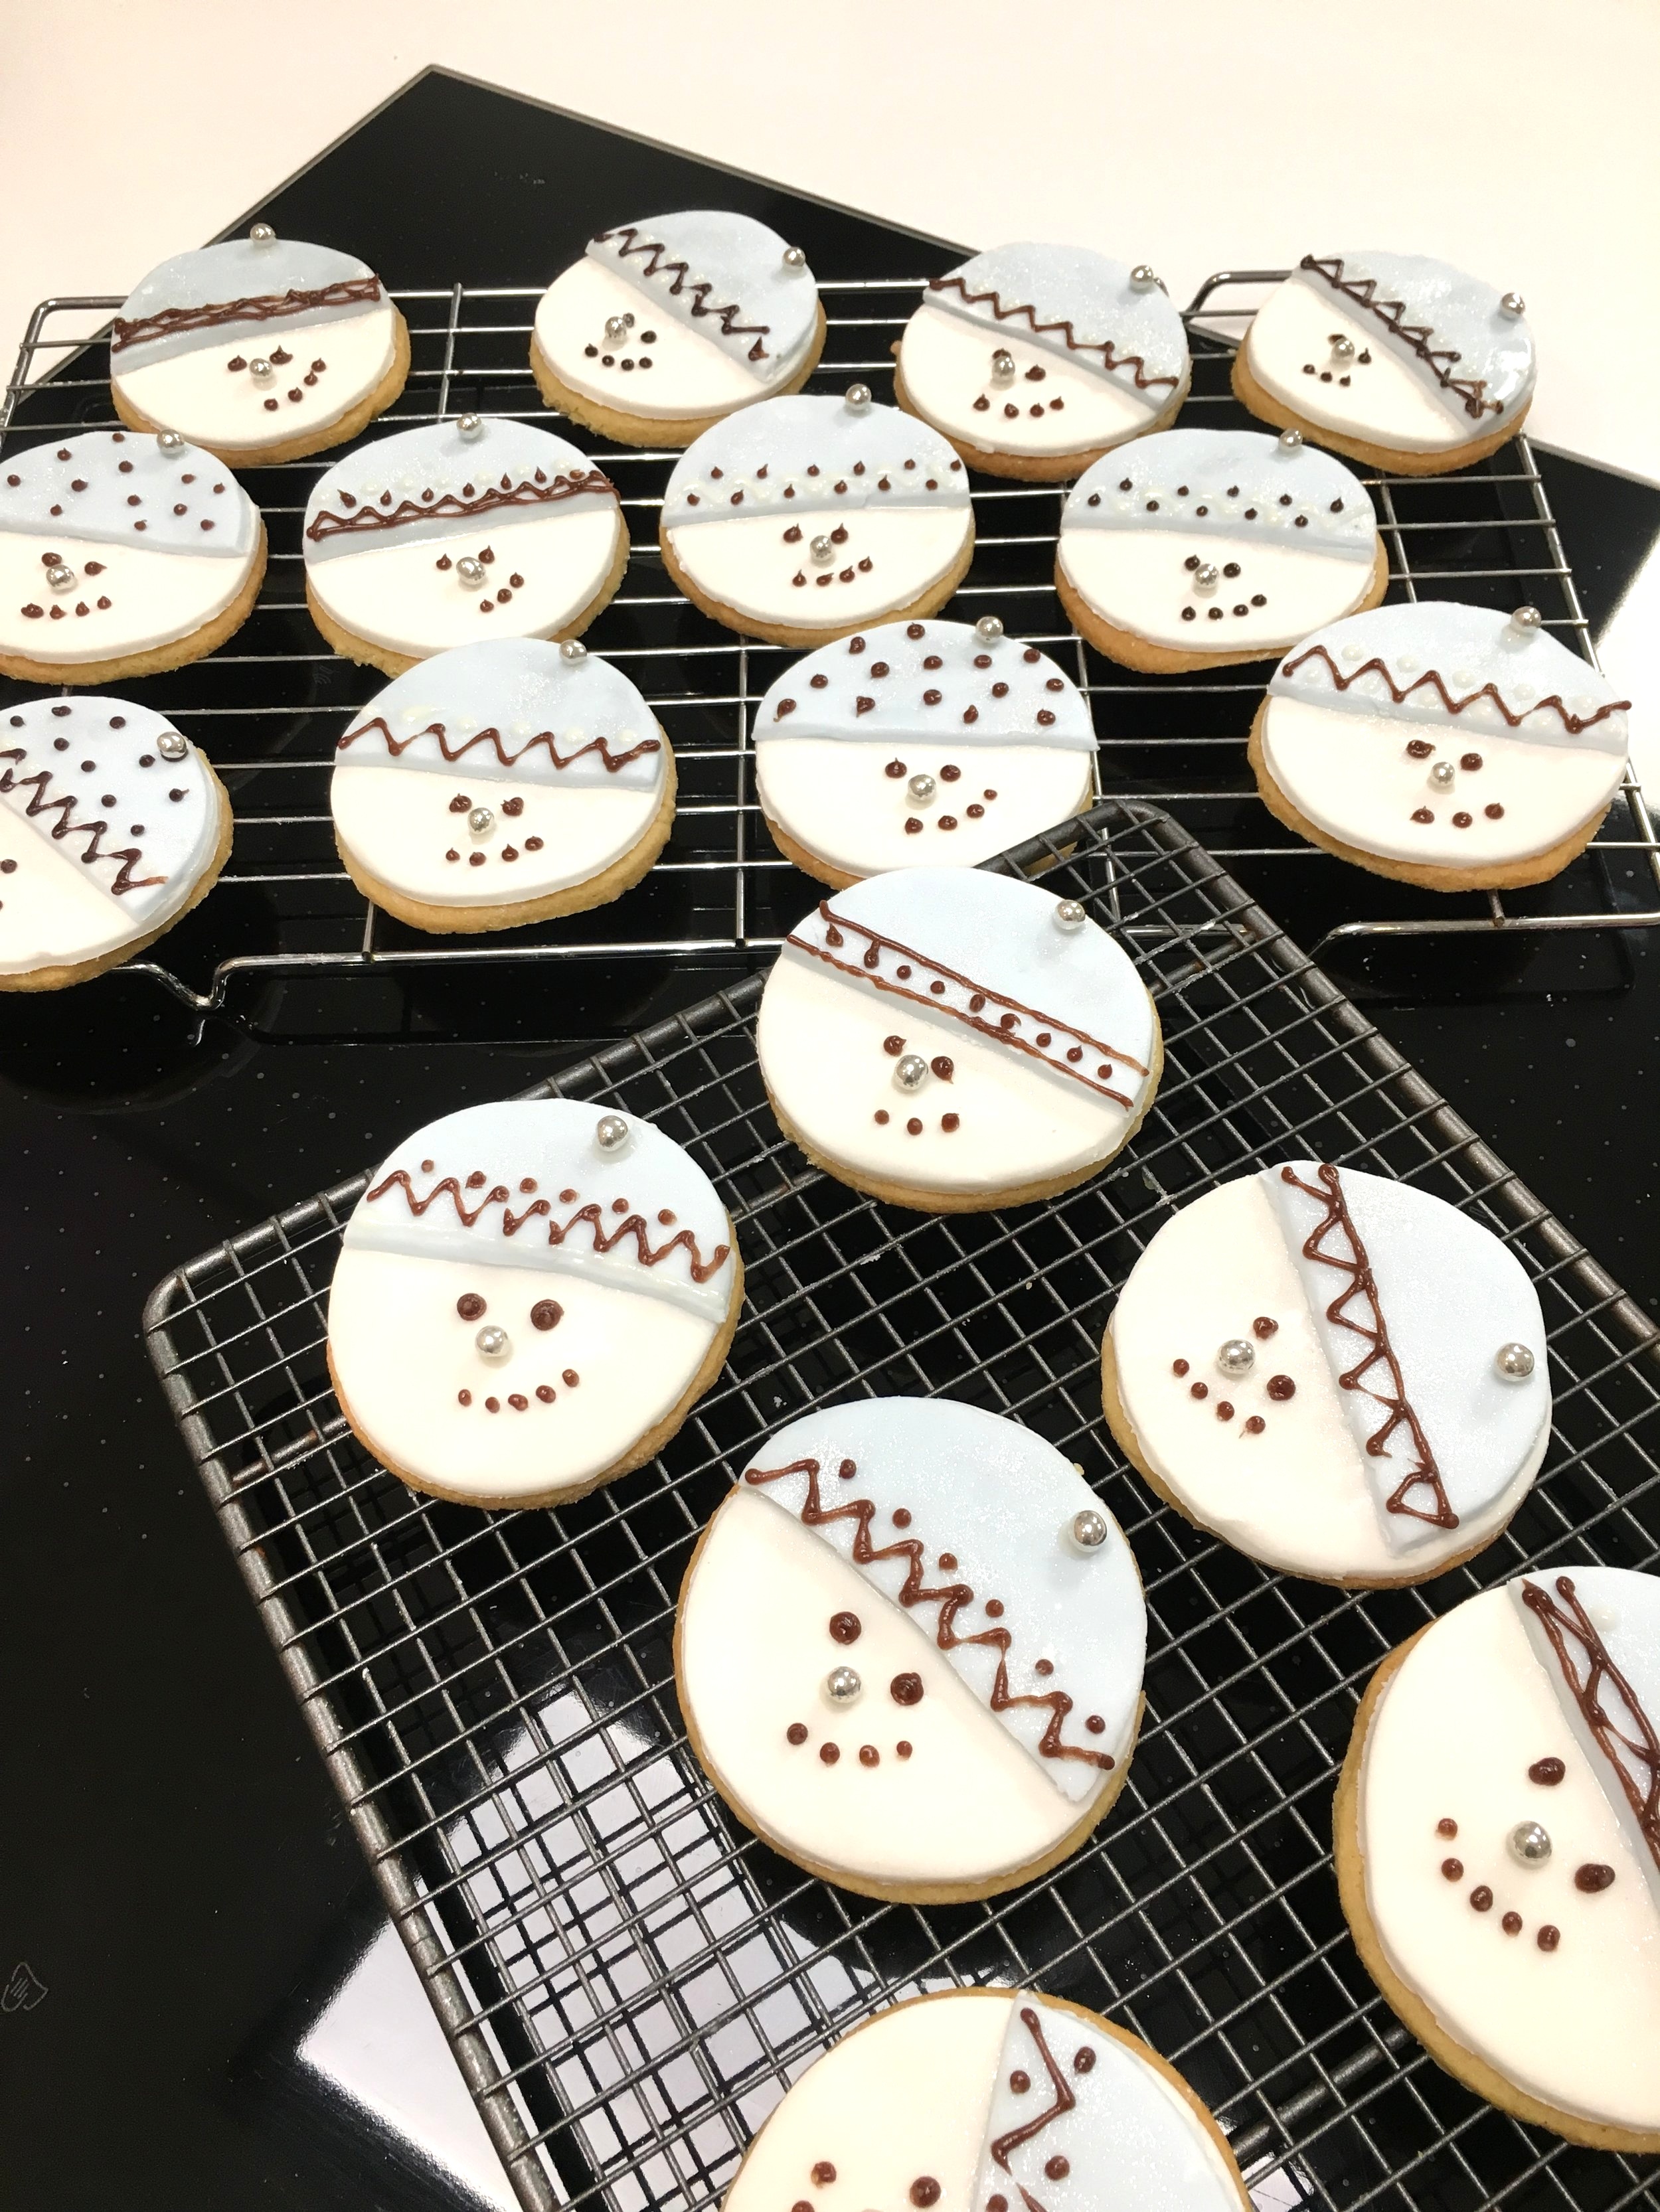
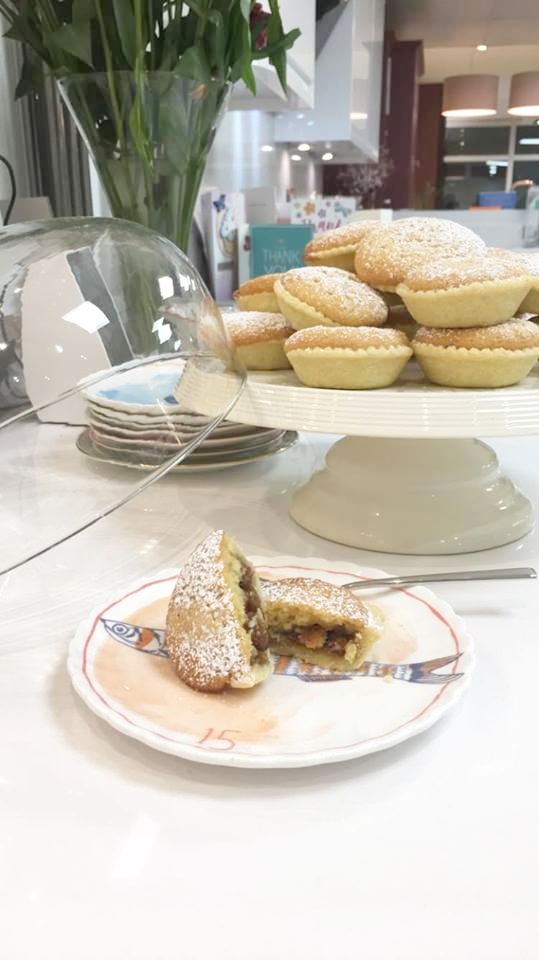
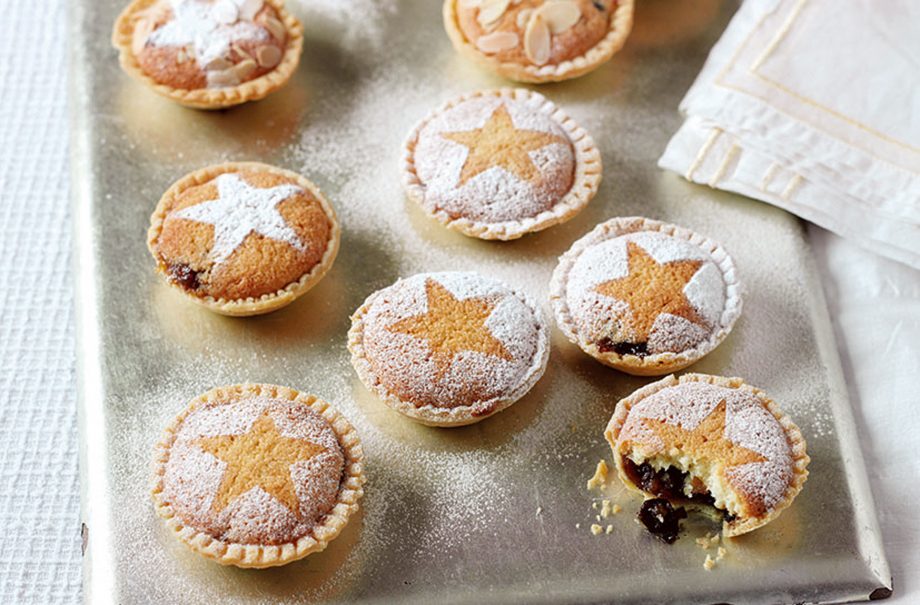
From ghostly biscuits to a spiders nest cake there are plenty of ways to bring the some spookiness to your half term bakes. Why not create lots of Halloween party food so you can host your own family scarefest? One of our favourite & easiest recipes are spider cupcakes. Simply make a batch of your favourite cupcakes, when cooled spoon over smooth white icing then with a black (or chocolate icing) pipe on 3 circles, carefully run a toothpick from the centre of the cake to outerconer to create a cobweb effect.

halloween cupcakes.jpg

Organic Seasonal Produce

What a wonderful start to the long bank holiday weekend we have had here at IDEAS, two of our lovely customers who grow their own fruit and vegetables brought in boxes of homegrown produce for us to enjoy over the weekend, we really do have the best customers.

Helen quickly got to work using some of the produce by making a beautiful meal of beef wellington, roast potatoes and lots of the wonderful vegetables. Next on her list is to use is the beautiful rhubarb in which a Rhubarb cake is going to be made, below is the recipe for you all to try at home.

Please note that we are closed this bank holiday from Saturday 24th August - Monday 26th August and re-open on Tuesday 27th August at 9am. We hope you have a lovely, relaxing weekend full of sun!

Insta post veg.jpg

Ingredients

For the cake

300g Rhubarb

165g Self raising flour

175g Butter

175g Caster sugar

3 Large eggs

2 tsp Vanilla paste

Juice of ½ a lemon

For the crumbly topping

25g Butter

2 tbsp Self-raising flour

1 tbsp Caster sugar

2 tsp Ground ginger

Cream or ice cream to serve

Method

Preheat the oven to 180 c, fan 160 c. Grease and line a 23cm square tin

Trim and chop the rhubarb stems into 3cm pieces, mix with the lemon juice & set to one side

Whisk the remaining cake ingredients together to make a smooth batter

Fold in half the rhubarb and spoon the mixture into the greased tin, scatter over the remaining rhubarb

For the topping, rub the butter into the flour until the mixture resembles breadcrumbs, then stir in the sugar & ginger. Sprinkle over the cake batter and bake for 50 minutes

Remove from the oven and cool in the tin for 10 minutes before turning out

Cut the cake into squares and serve warm or cold with a big dollop of cream or ice cream.

Recipe taken from the Sainsbury’s magazine

Snowman Christmas Biscuits

These Christmas biscuits are beautifully buttery, sweet and perfect for the holiday season! The cookies themselves are really easy and quick to make and the topping can be anything you want it to be, so a really great Christmas holiday activity to do with your children or grandchildren. We went for little snowmen and they have gone down a treat in the showroom!

This recipe makes 15-20 depending on the size of your cookie cutter.

For the biscuits

7oz Self raising flour

3½ oz Soft brown sugar

4oz Salted butter

1 large free range egg

1 tsp Vanilla paste

For the decoration

1 block of ready to roll fondant icing

Food colouring of your choice (to dye half of the fondant icing)

Icing pens

Silver edible balls

Edible glitter (optional!)

Method

Pre heat the oven 180C

Mix together the flour and sugar then begin to rub in the butter with your fingertips until fine breadcrumbs are formed.

Add in the egg and vanilla paste to the breadcrumb mix until a soft dough is formed (don’t worry if it feels a little sticky)

On a well floured surface begin to roll your sweet dough with a rolling pin. Use a cookie cutter of your choice to cut into desired biscuit shapes! Place the biscuits on a well greased baking tray and pop into the oven for 10-12 minutes or until golden brown. They will feel a little soft when first taken out of the oven but they will harden.

Cool on a wire rack. Begin to decorate when they are completely cool.

Roll out the white fondant icing and cut with the same sized cookie cutter as your biscuits, brush the back of each circle with a little warm water and place onto each biscuit.

Dye the other half of the fondant icing (We went with light blue) and cut to the same size as the white fondant icing. Then cut each circle in half to create the snowman’s hat! Brush the back of each hat with warm water and stick on top of the white circle.

Using the icing pens, pipe on eyes, a mouth and a nose which you can stick the edible balls to. Add any additional decoration such as hat detail and then brush with edible glitter for an extra special touch! Allow to set.

Happy Christmas x

Mince Pies with a Twist

The epitome of Christmas time, the humble mince pie! But they aren’t always everyone’s cup of tea, due to their sometimes overpowering filling. Helen of IDEAS has come up with a recipe that takes the edge of the often overfilled mince pie. Beautiful mincemeat, encased in homemade butter pastry with a sponge top to balance the pie. Perfect with a cup of tea after a festive day of fun!

For the pastry: (You could also buy a block of shortcrust pastry)

4oz Butter

8oz Plain Flour

6oz Soft Brown Sugar

A pinch of salt

A tiny bit of water!

For the cake topping:

6oz Butter

6oz Soft brown sugar

8oz Plain Flour

3 Eggs

1 ½ tsp baking powder

Pinch of salt

2 tbsp of milk

1tsp Vanilla paste

For the mincemeat filling:

1 jar of good quality mincemeat

2oz Butter

A good glug of maple syrup

Method

To make the pastry rub together butter, sugar, flour and salt until fine breadcrumbs are formed. Slowly add in water to bind the mixture together until a ‘ball’ is formed. Leave the pastry to rest whilst the filling is made.

For the mincemeat mix, combine all the mincemeat filling ingredients into a pan and put over a medium head until butter has fully melted and the mixture has started to turn silky. Take of the heat and allow to cool.

Set the oven to 160°

To make the sponge topping, cream the butter & sugar together until light and fluffy. Using a spatula gently fold in one at a time the eggs with a spoonful of flour and the baking powder until all are mixed in. The mix may feel a little thick at this point so add in a little of the milk at a time until the desired consistency is reached.

Grease 2 x 12 case cupcake tins.

Roll out the pastry until around 1cm thick and using a round 9/10cm cookie cutter make 24 cookie rounds. Pop each pastry round into the tin and spoon a teaspoon of the mincemeat mixture into each pastry case (leaving enough room on top for the sponge!) Top each mincepie with a teaspoon of cake mixture.

Pop each tin into the preheated oven for 20mins or until the cake mixture is looking golden brown and springs back when touched.

Enjoy with a cup of tea or a glass of mulled wine!

The Quooker Boiling Water Tap

The Quooker flex tap is one of the IDEAS’ teams favorite kitchen products, an innovative and clever tap which saves money, water and makes a cup of tea in record time! The flex is the newest addition to the Quooker range combining a boiling water tap with a flexible pull out hose for easy cleaning around the sink. Once you start using the Quooker tap it is hard to imagine a kitchen without one, it eliminates the need for a kettle, therefore freeing up valuable workspace as well as having the option to provide you with filtered tap water.

Features

Did you know that the Quooker Taps are the only boiling water taps on the market that deliver your water at 100°C.There is a tap on the worktop and a tank underneath your sink to deliver you that perfect cup of tea everytime! You can choose to either have a separate Quooker tap next to your usual mixer tap or the Quooker flex/fusion which is single tap for hot, cold and boiling water. There is also the option to have a filtered water tank installed alongside your boiling water tank.

quooker-flex_nl_sla-700x400.jpg

Efficiency

If you are worried that the Quooker tap may be wasteful, think again! The high-vacuum insulation ensures that the Quookers standby usage is just 3 pence per day.  For an even more efficient tap choose a COMBI tank, an economical way to produce both hot and boiling water.

Safety

One of the questions about the Quooker is “Is it safe?”, the answer in short is extremely! Gone of the days of worrying about dropping the kettle, spilling it or scalding yourself with steam. The Quooker is fitted with a ‘push and twist’ child proof handle and insulated casing insuring it never feels hot to touch. The way the water is dispensed means the flow is more of a spray than a solid jet, giving you plenty of time to get your hands out of the way if the worst was to happen.

No kitchen is complete without its Quooker.

Pop into IDEAS Nottingham today to see how it works.

The Bake Off Series - Lemon Drizzle

This week the lovely ladies from our kitchen door retailer Second Nature traveled to our showroom to see Helen in action and baking one of our favorites Lemon drizzle cake! We had a lovely chat all things baking, kitchens and interior trends along with lots of tea a few slices of cake! Follow the recipe below to make your very own.

Ingredients for the cake

9oz Salted Butter

9oz Soft Brown Sugar

12oz Plain Flour

4 Eggs

2 ½ Tsp Bake Powder

3 Tbsp Milk

The rind of 2 Lemons & a little juice

Pinch of salt

Ingredients for the Lemon Curd (You could buy this also!)

• 100g (4oz) butter

•  225g (8oz) granulated sugar

•  3 standard eggs and 1 extra egg yolk

•  Juice and grated rind of 3 lemons

Ingredients For the Icing

6oz Icing Sugar

Lemon juice from 2 lemon

Lemon rind to decorate

A little water if it is too thick

Method

Step 1

Preheat your oven at 160°c/325°f, Gas No 3.

Prepare 2 20cm/8inch round cake tins with greaseproof paper.

Cream your butter with the sugar, lemon rind and a pinch of salt for 3 to 4 minutes, until appearance is light a fluffy. 

 Step 2

One at a time, beat in the eggs, adding a tbsp of flour, lemon juice and milk with each. Sieve together the rest of the flour and the baking powder, then gently fold this into the egg mixture with a large metal spoon. 

 Step 3

Split your prepared mixture in to the two cake tins and smooth the tops. Bake in the centre of the oven for 1 ½ to 1 ¾ hours.

Step 4

While the cakes are baking, it’s now time to make the lemon curd filling.

Start by melting butter over a pan of simmering water. Next, beat together the eggs and extra yolk, then combine with the sugar, lemon rind and juice.

Step 5

Add the mixture to the melted butter and cook gently (not allowing to boil) until the curd thickens enough to cover the back of a spoon. Don’t allow to overheat as this could make the mixture curdle.

Pour into a storage container and allow to cool as your cakes bake.

 Step 6

Once you’re satisfied the cakes are baked, take out of the oven and leave them in the tin for 5 minutes. Then, turn the cakes out on to a wire cooling rack.

 While they are warm, mix together the juice of ½ a lemon and a little icing sugar, and drizzle this over both cakes to keep them moist.

 Allow to go cold, then peel off the greaseproof paper.

Step 7

Spread a desired level of lemon curd on to the top of one of your cakes, then place the other cake on top, forming a sandwich.

 Next, whip up some icing using icing sugar and lemon juice to taste.

 Pour over the top of your cake, allowing to trail the outside. As a finishing touch, decorate with lemon rind.

ENJOY!

Traditional Pasta Sauce

Looking for the perfect, basic pasta sauce recipe? Then look no further, Helen’s tried and tested recipe has been cooked for many years and always goes down very well. Originally taught to her by her Italian mother-in-law, Helen has now got this Italian essential down to a fine art. This sauce is the perfect base for any tomato based recipes such as Bolognese, moussaka and chilli con carne – just add in anything you fancy!

Ingredients

-        1 carton of tomato passata

-        1 carrot diced

-        1 medium onion diced

-        Sprinkle of sugar

-        Rapeseed oil

-        We also add a little mince meat (optional)

-        Garlic clove (optional)

-        Cherry tomatoes (optional)

Method:

Heat some rapeseed oil in a large pan

Add the diced onion to the pan and lightly fry (be careful not to overcook)

Pop the diced carrot in as well as some salt & pepper

Add in the garlic if you are using

Once all the veg is starting to soften add in the mince meat if using

Add in the carton of passata to the pan

If you are using cherry tomatoes add these in

On a low heat allow the sauce to bubble away for 3hrs +

Add in a sprinkling of sugar

You will start to see a dark red oil appear at the top of the sauce this is the sauce becoming richer and tastier!

Once the sauce has been bubbling away for 3hrs add to your favourite pasta and enjoy!

Delicious ButterMilk Scones

These moorish scones are a big hit with everyone! Made using buttermilk, which is available in most big supermarkets, rather than the traditional milk we find the rise much better on them whilst also regaining a fluffier, lighter texture. Adapt the recipe according to your occasion we love really cheesy scones or sweet cherry ones. YUMMY!

Ingredients :

3 cups of Plain Flour

1/3 cup of Butter melted

1 ¼ Butter Milk

¼ tsp Salt

2 tbsp baking powder

If making sweet scones add 1/3 cup of Sugar and or/dried fruit

Method :

Pre heat the oven on the top/bottom heat at 220° 

In a large bowl combine the flour, baking powder, salt and butter

Pour the butter milk into the dry mix

If making flavoured scones, at this point add in either grated cheese for savory scones or chopped cherries/raisins for a sweet scone (remember the sugar!) 

With a knife combine all the ingredients until fully mixed and they begin to come together

On a clean worksurface sprinkle with flour and pop the scone mixture onto a floured worksurface

As tempting as it may be do not mess with the mix too much, no kneading!

Once the dough has come together and is in a ball, pat down so it is around 3cm high

With a knife cut the dough into 8 sections (they will be triangle in shape)

On a pre-heated baking tray place the scones on it and pop in the oven for 12-15 mins – check they are golden brown and cooked all the way through

Enjoy with lashings of butter!