Not seeing a Scroll to Top Button? Go to our FAQ page for more info.

recipe

Snowman Christmas Biscuits

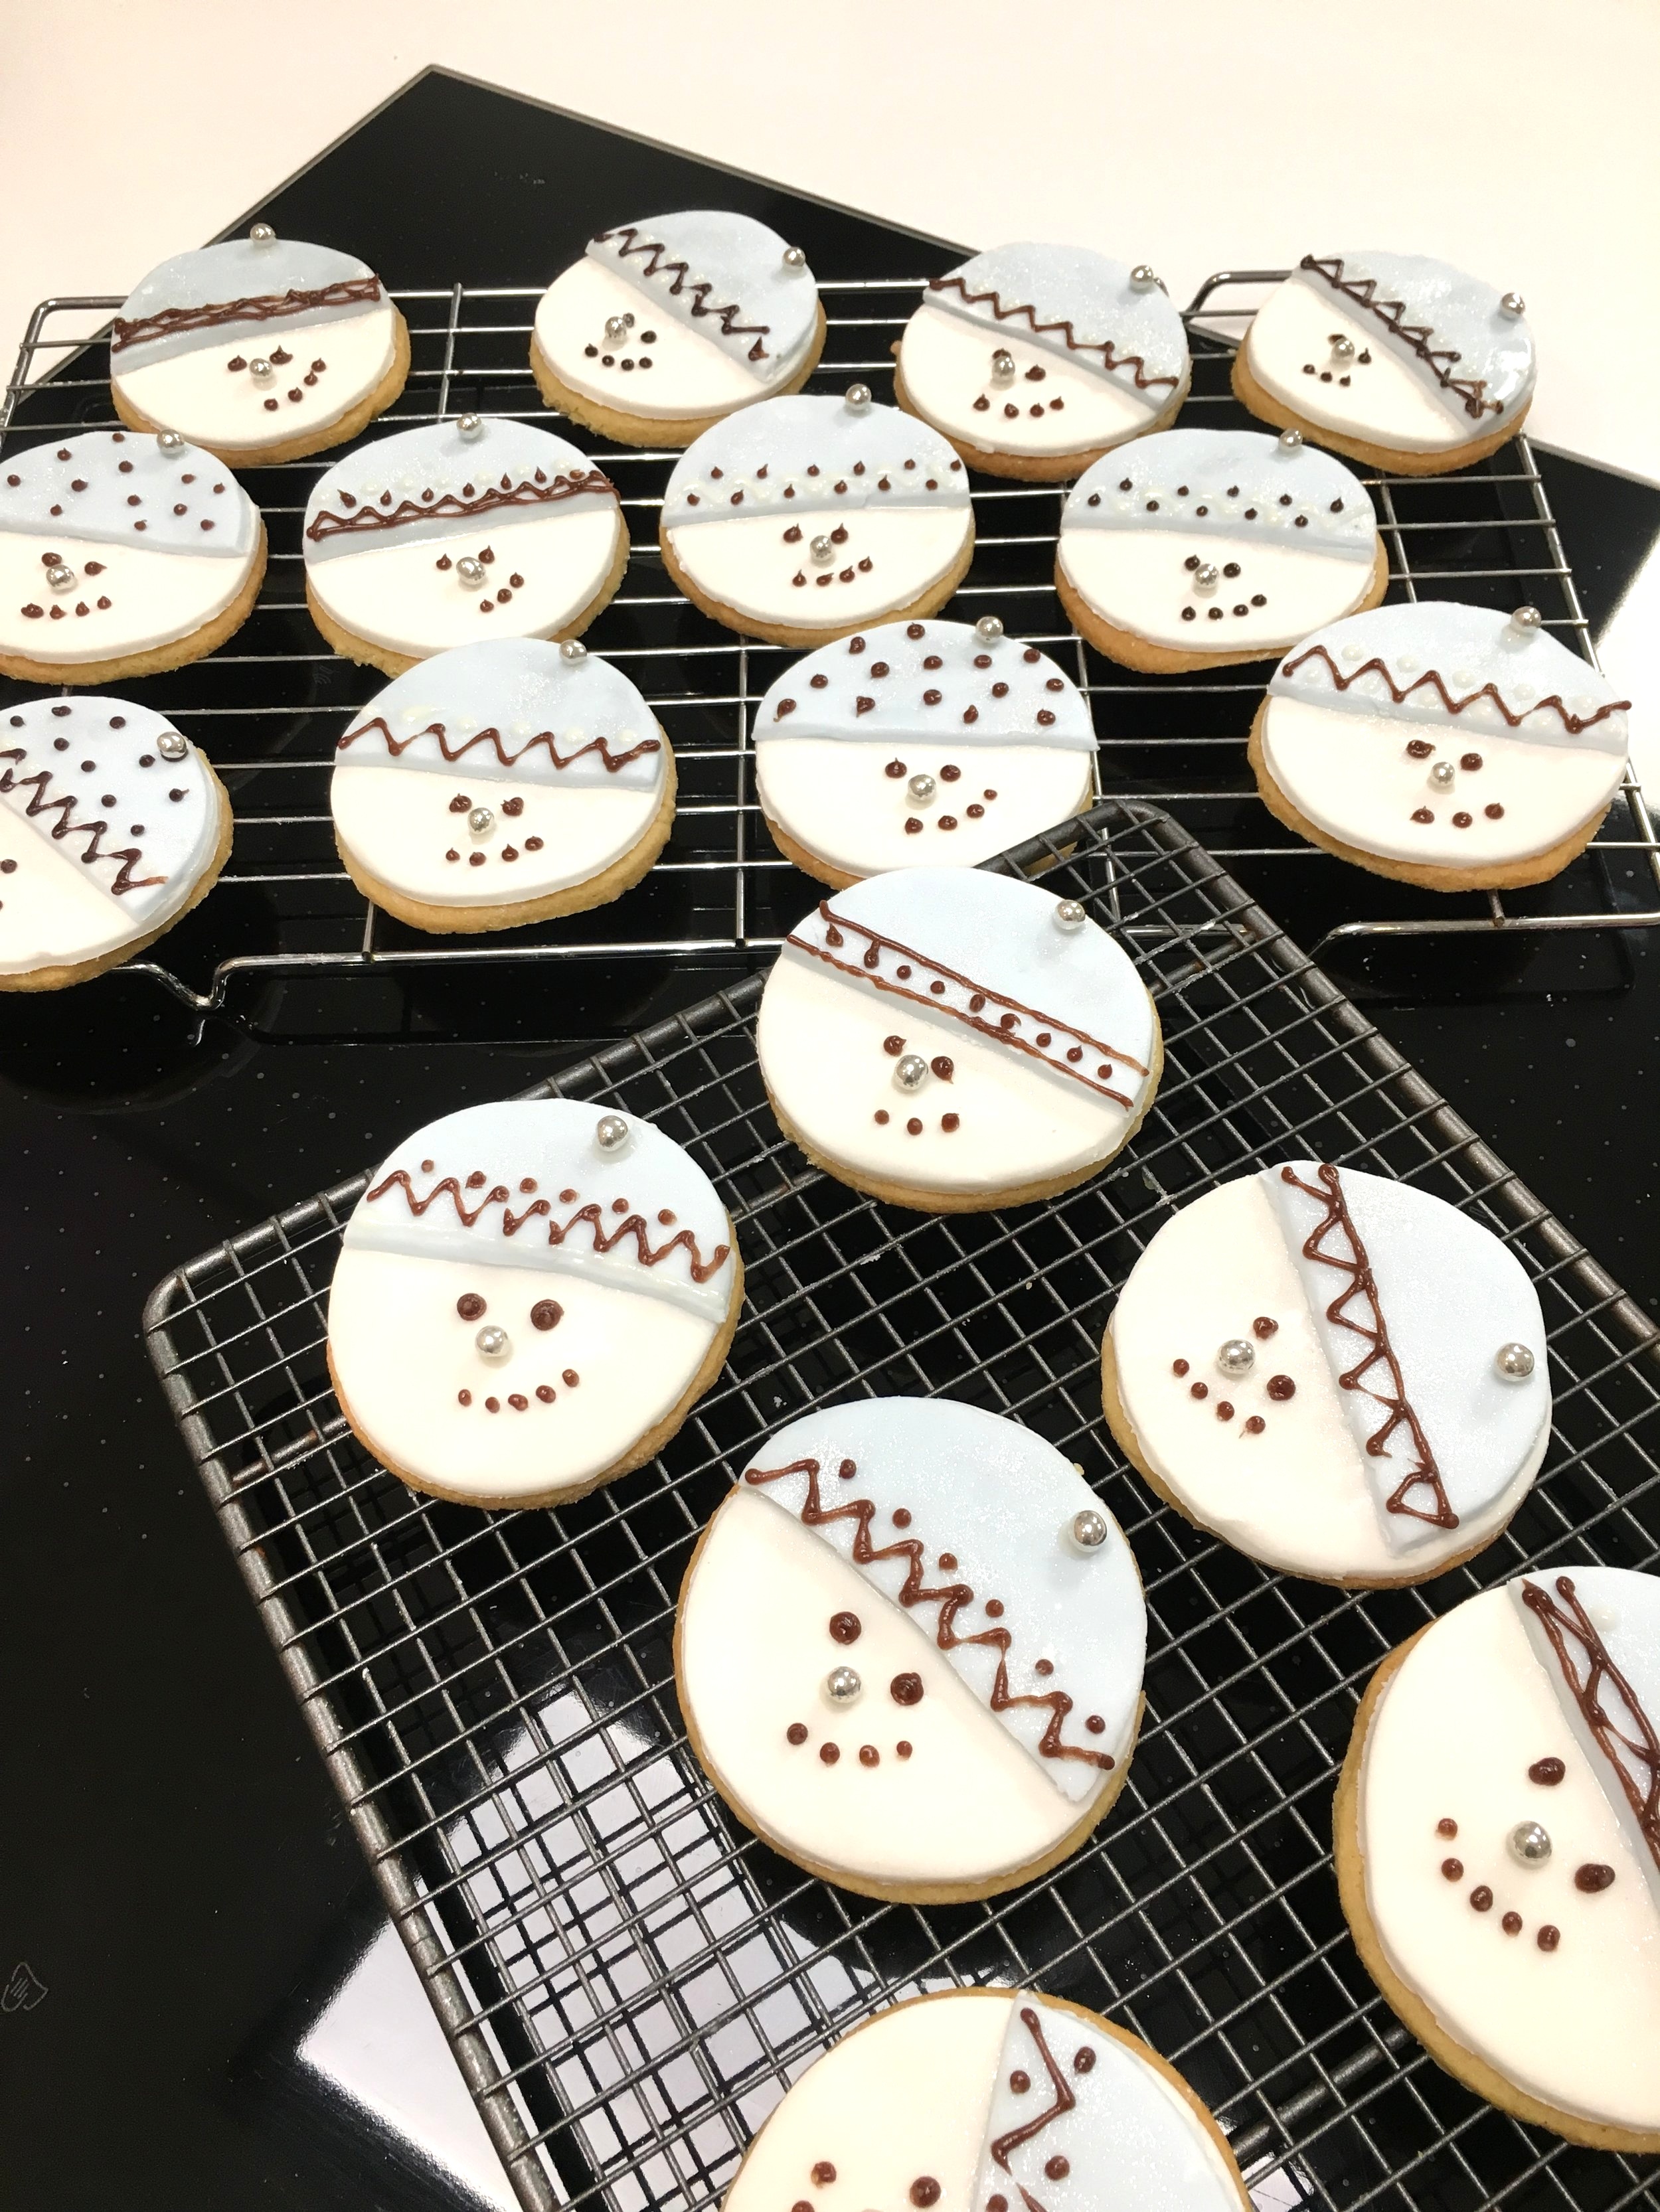
These Christmas biscuits are beautifully buttery, sweet and perfect for the holiday season! The cookies themselves are really easy and quick to make and the topping can be anything you want it to be, so a really great Christmas holiday activity to do with your children or grandchildren. We went for little snowmen and they have gone down a treat in the showroom!

This recipe makes 15-20 depending on the size of your cookie cutter.

For the biscuits

7oz Self raising flour

3½ oz Soft brown sugar

4oz Salted butter

1 large free range egg

1 tsp Vanilla paste

For the decoration

1 block of ready to roll fondant icing

Food colouring of your choice (to dye half of the fondant icing)

Icing pens

Silver edible balls

Edible glitter (optional!)

Method

Pre heat the oven 180C

Mix together the flour and sugar then begin to rub in the butter with your fingertips until fine breadcrumbs are formed.

Add in the egg and vanilla paste to the breadcrumb mix until a soft dough is formed (don’t worry if it feels a little sticky)

On a well floured surface begin to roll your sweet dough with a rolling pin. Use a cookie cutter of your choice to cut into desired biscuit shapes! Place the biscuits on a well greased baking tray and pop into the oven for 10-12 minutes or until golden brown. They will feel a little soft when first taken out of the oven but they will harden.

Cool on a wire rack. Begin to decorate when they are completely cool.

Roll out the white fondant icing and cut with the same sized cookie cutter as your biscuits, brush the back of each circle with a little warm water and place onto each biscuit.

Dye the other half of the fondant icing (We went with light blue) and cut to the same size as the white fondant icing. Then cut each circle in half to create the snowman’s hat! Brush the back of each hat with warm water and stick on top of the white circle.

Using the icing pens, pipe on eyes, a mouth and a nose which you can stick the edible balls to. Add any additional decoration such as hat detail and then brush with edible glitter for an extra special touch! Allow to set.

Happy Christmas x

Mince Pies with a Twist

The epitome of Christmas time, the humble mince pie! But they aren’t always everyone’s cup of tea, due to their sometimes overpowering filling. Helen of IDEAS has come up with a recipe that takes the edge of the often overfilled mince pie. Beautiful mincemeat, encased in homemade butter pastry with a sponge top to balance the pie. Perfect with a cup of tea after a festive day of fun!

For the pastry: (You could also buy a block of shortcrust pastry)

4oz Butter

8oz Plain Flour

6oz Soft Brown Sugar

A pinch of salt

A tiny bit of water!

For the cake topping:

6oz Butter

6oz Soft brown sugar

8oz Plain Flour

3 Eggs

1 ½ tsp baking powder

Pinch of salt

2 tbsp of milk

1tsp Vanilla paste

For the mincemeat filling:

1 jar of good quality mincemeat

2oz Butter

A good glug of maple syrup

Method

To make the pastry rub together butter, sugar, flour and salt until fine breadcrumbs are formed. Slowly add in water to bind the mixture together until a ‘ball’ is formed. Leave the pastry to rest whilst the filling is made.

For the mincemeat mix, combine all the mincemeat filling ingredients into a pan and put over a medium head until butter has fully melted and the mixture has started to turn silky. Take of the heat and allow to cool.

Set the oven to 160°

To make the sponge topping, cream the butter & sugar together until light and fluffy. Using a spatula gently fold in one at a time the eggs with a spoonful of flour and the baking powder until all are mixed in. The mix may feel a little thick at this point so add in a little of the milk at a time until the desired consistency is reached.

Grease 2 x 12 case cupcake tins.

Roll out the pastry until around 1cm thick and using a round 9/10cm cookie cutter make 24 cookie rounds. Pop each pastry round into the tin and spoon a teaspoon of the mincemeat mixture into each pastry case (leaving enough room on top for the sponge!) Top each mincepie with a teaspoon of cake mixture.

Pop each tin into the preheated oven for 20mins or until the cake mixture is looking golden brown and springs back when touched.

Enjoy with a cup of tea or a glass of mulled wine!

Chocolate & Orange Cake

This tasty and easy to make chocolate and orange cake has been perfected by Helen. Add in orange juice and golden syrup for an extra tasty and without any of the dryness of a traditional chocolate cake. It tastes amazing on a Sunday afternoon with a cup of tea and a good book!

Ingredients for the cake

-        10oz Plain Flour

-        2oz Coco Powder

-        7oz Soft Brown Sugar

-        2oz Golden Syrup

-        2 ½ tsp Baking Powder

-        4 Eggs

-        ½ tsp Vanilla Paste

-        Juice of One Orange

-        Zest of 2 oranges

Ingredients for the filling & topping

-        3oz Butter

-        6oz Icing Sugar

-        Zest of orange juice

-        ½ a jar of orange curd

-        Dark chocolate melted

Method:

Preheat your oven to 160° and line two 20cm sandwich tins

Cream the butter, sugar and golden syrup together until light and fluffy

Add in the eggs, 2 at a time adding 1 spoonful of flour at a time

Stir in the remaining flour, the coco powder and the baking powder

Squeeze in the juice of 1 orange, zest of 2 oranges and the vanilla paste

Stir together all the ingredients but be careful not to over beat

Divide the cake mixture into 2 tins

Pop in the oven for 25-30 minutes or until cooked all the way through

Whilst the cake is cooking combine the Icing sugar together along with some of the orange juice (add in as needed to get the correct consistency.) Plus a little vanilla paste.

Pop the buttercream into a piping bag (if you do not have a piping bag it is fine to just spoon onto the cake!)

Once the cakes are fully cooled squeeze the remaining orange juice over the sponges

Spoon on the orange curd over one of the cakes and then pipe on the buttercream until the cake is covered

Pop the second cake on top of the buttercreamed half of the cake

Melt a bar of dark chocolate over a low heat mixed with a little golden syrup and butter

Pour the chocolate all over the finished cake

ENJOY!

Delicious ButterMilk Scones

These moorish scones are a big hit with everyone! Made using buttermilk, which is available in most big supermarkets, rather than the traditional milk we find the rise much better on them whilst also regaining a fluffier, lighter texture. Adapt the recipe according to your occasion we love really cheesy scones or sweet cherry ones. YUMMY!

Ingredients :

3 cups of Plain Flour

1/3 cup of Butter melted

1 ¼ Butter Milk

¼ tsp Salt

2 tbsp baking powder

If making sweet scones add 1/3 cup of Sugar and or/dried fruit

Method :

Pre heat the oven on the top/bottom heat at 220° 

In a large bowl combine the flour, baking powder, salt and butter

Pour the butter milk into the dry mix

If making flavoured scones, at this point add in either grated cheese for savory scones or chopped cherries/raisins for a sweet scone (remember the sugar!) 

With a knife combine all the ingredients until fully mixed and they begin to come together

On a clean worksurface sprinkle with flour and pop the scone mixture onto a floured worksurface

As tempting as it may be do not mess with the mix too much, no kneading!

Once the dough has come together and is in a ball, pat down so it is around 3cm high

With a knife cut the dough into 8 sections (they will be triangle in shape)

On a pre-heated baking tray place the scones on it and pop in the oven for 12-15 mins – check they are golden brown and cooked all the way through

Enjoy with lashings of butter!

Helen's Famous Chocolate & Banana Cake

Looking for the perfect crowd pleasing cake? Try Helen's adapted version of this Nigel Slater recipe. It never lasts long in our showroom. Bake it yourself to find out why!

You will need:

Cake baking enthusiasm!

375g Plain Flour

3 teaspoons of baking powder

190g softened butter

350g muscovado sugar (this is very important for the taste!)

600g ripe bananas (the riper the better!)

1 1/2 tsp vanilla extract

3 eggs

150g dark chocolate

Non-stick loaf tin approx 24cm x 12cm x 7cm deep

Method:

Set the oven to 180c/Gas 4 and line the tin with baking paper

Sift the flour and baking powder together

Cream the butter and sugar together till light and fluffy (Helen prefers to do this by hand but you can do it with an electric mixer if you prefer)

Put the bananas in a bowl and mash with a fork – they should be lumpy rather than a puree. Next stir in the vanilla extract and then fold into the butter & sugar mix.

In a separate bowl beat the eggs lightly with a fork then pour them into the butter, sugar  & banana mixture and stir well – if you see any signs of curdling add in a spoon of flour.

Chop the chocolate into small chunks and fold them into the bananas, sugar, butter and egg mix.

Next gently fold in the flour and baking powder into the mix until fully mixed and no flour remains.

Pour mixture into a lined tin.

Pop into your Neff slide & hide oven for 60 minutes (check after this time as it may need a little longer)

Take out – allow to cool and enjoy!